Pages

Showing posts with label Thompson and Morgan. Show all posts

Monday, 9 September 2013

Seeds - buying, storing and saving


On Buying, Saving and Storing Seeds

It’s a wet morning and the rain is much needed though, I fear the light drizzle we are experiencing will do little to soften the rock hard ground. One of my chores for this morning [well it’s not really a chore, it’s an activity I love!] is to order garlic bulbs, broad bean seeds for autumn planting and seed potatoes – well, I will think about the potatoes.

For autumn planting broad beans, I guess I will continue to buy Aquadulce Claudia. They have been fairly successfully for me over the years – some seasons spectacularly so and other years, like this one, not so good. In fact this spring they were a complete failure and I have had to resort to spring sown broad beans which carry problems of their own, not least black fly. I’m assuming my complete failure was due to the particularly wet season we had last year which continued over winter and into the spring. This probably resulted in the seeds and young plants rotting in my heavy clay soil.
I have found that, in good years, there is no need to sow in spring as well – the autumn sown beans have provided me with a good harvest until French and runner beans are ready for harvesting.
I see that Thompson and Morgan [their main autumn catalogue has just dropped through my letter-box] are suggesting using Summer Savoury as a companion plant for broad beans to repel black fly. As I grow this herb anyway, for culinary use, next year I will plant it beside my broad beans as they mature and see how well it works. This is a fairly low growing annual herb, easy to grow and adds a wonderful savoury flavour to casseroles, etc.

Garlic, this year, will require a little more thought. I have, in the past tried growing several different varieties – hard-neck, soft-neck and semi hard-neck varieties. For my ground I have found Solent Wight and Purple Wight to be the most successful. These are both soft neck varieties. The Purple Wight will be ready for harvesting from June onwards but won’t store as well as the later Solent Wight.
As always, I am looking for new varieties to try and this year I am not disappointed – there are several on the market which are suitable for UK conditions and for autumn planting. They can be planted from September so do plan now. I see that there is now an Early Purple Wight available which can be harvested from May onwards but, again it won’t store well. I am always looking for a garlic with a good strong flavour with plump cloves so I might add a third variety to my plantings this autumn and Provence Wight would seem to be a good candidate. T&M say ‘The large, fat cloves are superb in aioli and bouillabaisse but, adds a “taste of Provence” to all of your garlic recipes’.
It is normally recommended that garlic should be planted 5cm [2inches] deep but, on my heavy clay soil, if I planted them so deep I would never see them again. I usually plant them like onion sets with the tips just appearing above ground. I then cover with a net to keep birds from pulling them up.

I think I will need a little more time to consider my choices for potatoes – again there are new varieties on the market as well as some old favourites but, I will come back on this.

Buying seeds can be a significant expense each year and it is probably worth looking at different ways of reducing this expense:
Seed Packet Information and Instructions
To the uninitiated the information and instructions can be fairly unintelligible and, in some cases, not sufficiently informative.
I do expect with a seed packet, to be told if the plant is annual [it will grow from seed, flower and seed with one season – the life of this plant will not extend beyond one season – eg, peas and beans, tomatoes, peppers, coriander[HA – hardy annual will grow successfully in a normal year outdoors in the UK]. [HHA – this plant is a half hardy annual – it will grow in the UK in the summer season as long as there are no frosts or other difficult unseasonal conditions].
Most of the vegetables we chose to grow in our allotments will be grown as annuals although not all are considered such as, if you wish to collect seeds from them they may actually be biennials – brassicas, carrots, parsnips, parsley, etc.
Biennial – the plants will grow from seed in one year but can survive a winter in a normal winter] to grow on in the following season to flower and run to seed – eg parsley and angelica [a favourite of a friend of mine].
Perennial – perennial plants will grow from seed [or cuttings, root cuttings, etc.] to create plants which will last for many years. The length of the life of that plant will depend on the conditions, the care given to the plant, the variety and the type.
HP – indicates a hardy perennial which should grow happily for many years in suitable conditions in the UK – fruit bushes and trees, rhubarb, horseradish, etc
HHP – indicating a half hardy perennial, will need care nurturing to ensure it survives cold winter conditions – eg. globe artichokes.
Seed packets will usually give very basic information on when and how to sow the seeds and how to grow on. However, some of the smaller and more specialised seed houses give little or no information on their seeds packets although the necessary information should be available in their catalogues or websites [these are not usually available in shops and garden centres].
The seed suppliers will rarely tell you if the seed can keep over for another year however, they should provide the date of packing [this is not always the date of seed harvesting].

o   Being able to carry–over seeds can be useful. As a rough guide seeds can have a life expectancy of approximately:
1 year only
2 years +
3 years
4 years +
Onions – seeds 1 – 2 years, sets 1 year only
Parsnips
Potatoes [tubers, not real seeds]
Parsley
Broad beans
French beans
Runner beans
Peas
Salsify and Scorzonera
Sweetcorn
Coriander
Beet – leaf
Beetroot
Leeks
Lettuce
Swede
Tomatoes
Turnips
Aubergine
Brassicas – broccoli, Brussels sprouts, cabbage, cauliflowers, kale,
Capsicum – peppers and chillies,
Carrots
Celery
Curcurbits – courgettes, cucumbers, squashes, pumpkins, marrows, melons
Radish
Spinach

Although I have kept some seeds beyond their life expectancy and a reasonable percentage has germinated, it is important that even seed with a long life expectancy should be stored in cool, dry, airtight conditions, in some cases even storage in a fridge will prolong seed life but, not in a freezer. Over years, for even those seed which have a long life, the viability will reduce. I have found that seeds I have collected myself from my own plants have had a much longer life expectancy than that for bought seed.
o   I don’t attempt to save seeds from plants where it means they will take up valuable growing space longer than necessary but, I will collect and save seeds from plants where the seeds themselves are the vegetable I will eat – eg. peas, beans and coriander and from vegetables where the crop is actually a ‘fruit’ of the plant that we will eat and therefore contains the seeds we can save – eg. squashes and pumpkins, marrows, tomatoes, peppers and chillies. This will only really work for standard seeds – not for F1 hybrids.
Beans, squashes and pumpkins have a reputation for being quite promiscuous so make not [will probably not grow true to the original seed]. I have never actually experienced much of a problem with beans although, on a couple of occasions I have had the odd climbing bean growing from a saved ‘dwarf’ variety.
Squashes and pumpkins, especially if planted among other varieties or, in a situation like an allotment field, are less likely to grow ‘true’. However, when I’ve planted them anyway, I’ve still managed to grow perfectly acceptable and tasty pumpkins. An allotment friend has suggested that growing your own seed actually gives a vegetable which is best suited to the conditions on your plot.
This year I have planted quite a wide range of pumpkins which I am now starting to harvest. I had added Turk’s Turban to the mix. I wonder what delights I will grow next year.
o  * Try sharing the seed order with a friend or neighbour to share packets [especially brassicas where you always get more than you need] or to buy in more commercial quantities eg. peas where a kilo could be no more expensive than a retail packet.
o   If you are planning to buy lots of seeds, plan in advance and order from a catalogue or on-line catalogue from one of the seed-houses [small organic growers like The Real Seed Catalogue or Nicky’s Seeds, can be much cheaper], rather than from a garden centre or retail shop. You may have to pay a little extra for postage but this is more than covered by the cost of the seeds.
o   Perhaps your Allotment Association or one close to you, has its own shop. Usually, as the seeds and equipment are bought in bulk, it will be much cheaper and savings should be passed on to members.

Wednesday, 8 May 2013

Growing asparagus


Asparagus  - asparagus officinalis
Asparagus is arguably the queen of vegetables. This is partly because of its fairly short season, particularly in the UK, its exquisite delicate flavour, the perception that it is tricky to grow and its undoubted high cost in shops.
One of the downsides of eating asparagus is the nasty smell experienced by many [though not all people who eat it]. It has long been believed that asparagus changes the smell of our urine, giving it a stench reminiscent of bad drains. However, on discussing this with a plant scientist recently who had done some work on this subject, she assured me that asparagus does not, in fact, alter the odour of our urine but, actually affects our sense of smell though, not in all subjects.
Sowing and Growing
Growing asparagus can be tricky but it is worth the effort even if your plot is less than ideal.
Although it is possible to grow asparagus from seed and it is certainly cheaper to do so, it does add another year to an already impatient wait until harvesting. Although I haven’t tried this method, if you would like to try it I recommend Nicky’s Nursery [www.nickys-nursery.co.uk] as being a reliable source of an excellent range of seeds, including organic and Heritage varieties.
Although I do love large garden centres - they inspire me, encourage me to spend money, keep me up-to-date with new products and developments in gardening and plants - they really are the last place to buy asparagus crowns. They come in polythene packets with very pretty and tempting illustrations, in a bed of very desiccated peat, where they have probably been hanging for some weeks, if not months. Each packet will probably contain 2 – 3 crowns where an odd shoot or two might just be visible to indicate a small sign of life. The chances of these crowns surviving is very touch-and-go and do need perfect conditions to establish.
Do buy your crowns from a reputable provider. It is usual to buy one-year-old or two-year-old crowns but some of the seed houses will supply three-year-old crowns which can save another year of waiting until harvesting. [though it is felt that younger crowns establish better.]
To plant – create a large raised bed [within a framework or not].
The crowns will need a well drained [sandy soil] and fertile site in a sunny situation. You must consider the site you have, which may not be suitable for growing asparagus. I grow in a very heavy clay soil yet, can still achieve an excellent asparagus crop for my own uses and to share with my friends. Create a good asparagus bed – for a bed for 10 crowns – think of an area of 3metres x 1.5 metres allowing for a staggered planting. I find it best to create a bed on a level with the surrounding ground then add loads of well rotted manure and compost [garden compost or bought-in] to a fairly high level several months before planting my crowns.  A wooden framework for this purpose is useful but, is not essential. Consider also that this bed will be more-or-less permanent as you can expect to harvest from these plants for around 20 years once they are well established.
Dig this out to allow for planting the crowns 20cms [8in] and the growing tips covered by 4 – 5 cm [2 inches] of fine soil or compost. Spread out the spider-like roots around the area and cover with compost or well-worked soil to give a good covering and growing environment. If the new plants are already putting up new shoots, you can allow them to appear above ground. The finished bed should be several inches – 6 – 8 [15 centimetres] above the surrounding ground. It is important to keep this area well weeded over the coming seasons.
If you are lucky enough to be growing on a light, sandy, well drained soil, it is not essential to create a raised bed, or even advisable as the beds could become too dry.
Water the bed well in dry weather.
The ferns can grow to a height of 1 metre and can be susceptible to wind rock, so support will be necessary. Keep the beds well weeded [don’t use a hoe]. As the ferns turn yellow in autumn they can be cut off leaving the bottoms of the stems a few centimetres above ground. Remove any debris, weeds or leaf litter and mulch the bed well to protect the crown during the winter.
Types and Varieties
Asparagus is a spring to early summer crop and the varieties you choose will dictate the when you will harvest. Some providers will offer a variety which can extend your harvesting period. It is thought that male plants are superior as they can live longer and the plants are not weakened by the production of seeds and many providers will claim that the crowns they are selling are male only. However, the seeds can be removed from the ferns as they develop and the female plants often produce thicker spears.
Connover’s Colossal is an old favourite which is still available but, there are many new varieties now available. The new purple varieties are considered to be sweeter and more tender than the green varieties and are delicious raw in salads [the sellers claim] but, do check what is available from the seed houses before you buy. For a good range of products try Thompson and Morgan – www.thompson-morgan.com, Marshalls – www.marshalls-seeds.co.uk, Suttons seeds – www.suttons.co.uk  , Dobies seeds – www.dobies.co.uk 
Harvesting and Storing
Asparagus should not be harvested for two to three years after planting [depending on the age of the crowns you buy] – the ferny tops should be allowed to grow to ensure the roots are well fed for the following year.
You can start to harvest – using a sharp knife, cut the stems below the level of the soil once the spears are 5 – 6in [12 – 15cm] high – from April into early June [depending on the variety.] You must stop harvesting by mid June to allow the next spears to grow to their ferny maturity which will build up the plants for subsequent year’s crops.
Asparagus should be cooked as fresh as possible but will keep in a fridge, in a polythene bag for up to three days.
To freeze – clean the spears well, cut off the tough ends. Sort the spears into small bundles depending on the thickness of the stems. Blanch them for 2 to 3 minutes, drain, cool and pack into suitable containers to freeze.

Nutritional Value
Excellent source of
Useful amounts
Traces

Vitamin C
Vitamin K
Fibre
Vitamin A
Vitamin E
Folate
Fat, Protein [incomplete]
Niacin, Thiamin and B6
Calcium, Iron, Magnesium, Phosphorus, Zinc
Potassium, Copper, Manganese, Selenium

Pests and Diseases
Pigeons – will eat the young growth from any young plants on our plots when nothing else is available. They will eat their way through the young spears as they appear above ground.
Slugs and Snails – Although not a serious pest, slugs and snails will eat the tops of the young spears as they appear.
Spindly shoots – if your crowns are having difficulty establishing after planting they may put out spindly, thin spears. Don’t attempt to harvest them. It is possible that, with good management and feeding, the crowns will improve. However, if this continues into a second year, it is probably best to abandon them and start again on a new bed.
If you harvest your spears too soon – before they have become established – you are likely to have spindly growth in the following year. You can try feeding them well and don’t harvest for a couple of years until the spears have become thicker and more plentiful.
If you continue to harvest too long into the season, the crowns will not have the time to develop enough ferny tops to nourish the crowns for the following year. Don’t harvest after early June.
Asparagus Beetle – is probably the worst pest of asparagus especially in the allotment situation where other growers are also dealing with this serious pest. If you are growing in a garden away from any other growers, it is not likely to be troublesome.
The beetles themselves don’t do any harm except to lay the eggs of this very specific plant pest. The larvae, are the main problem and will eat the ferns and the stems resulting in a reduced crop or no crop in the following year.


Remove the beetles as you see them and crush them along with any larvae you see [I advise wearing fine rubber or nitrile gloves for this purpose as they are unpleasant little pests]. It is a good idea to check every day or at least every time you visit your plot.

Friday, 18 May 2012

Mid May - beans, tomatoes, peppers, chillies, and more


Mid May – beans, tomatoes, peppers, squashes, etc
Well, of course, it’s now mid may and there is going to be an ‘of course’. This is the middle of the planting season – or is it?
I am an impatient person and I’m always pushing the seasons, especially springtime. Let’s face it, winter is not the lean season – that is spring, when the stored crops have run out and the new crops have not yet started. In four seasons out of five, in south west England, the earliest time suggested for sowing will work well and will give crops well ahead of the average harvesting season. However, this year has been unusual – a very hot dry March followed by the wettest April on record and not much improved by the first half of May – and it’s been cold.
My autumn sown broad beans have started to produce pods. I have lots of them and I find that cropping a few of the young pods can be cooked and taste much like French Beans. They are good to eat and really won’t be noticed from the main crop, which will ‘get-into-its-stride’ shortly.
I sowed my different varieties of French beans after soaking them and allowing them to sprout. Unfortunately, the weather turned very cold and wet and nothing much has happened with them. Yes, I know, they should be sown later rather than early  and June would have been better.
Today has been dry, though cloudy. My barometer dropped dramatically overnight so, I thought an early start might be useful, before the rain set in. I noticed, with some relief that my beans have started to germinate. I might have to re-sow but, as my daughter suggested last weekend, when she surveyed my plot – be patient! Mammy you are always so impatient. And, yes, today, I notice that the odd bean is beginning to appear above ground. This didn’t prevent me from re-ordering bean seeds but, I might now just keep them until next year.
I have found, this year particularly, when I have contacted Thompson and Morgan about orders I have placed [and in the past I have criticised them] that their telephone contacts have been – on the ball; have known what they are talking about; have been friendly and informative and have sorted my issues – 5 stars to them.
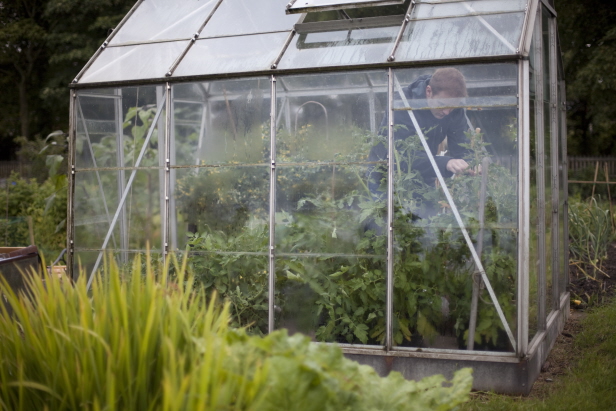
Back to the plot – My poly-tunnel has been a continuing problem this year. Red ants have been the biggest and most destructive pest. Every other year, I've had a few red ant nests and have more-or-less ignored them.This year, it has been apparent that they have been a major destructive pest. When I visited my plot, just to water the tunnel I have had to dig out and destroy more red ant’s nests. As I have said before, this season, I have been spraying with Py spray – a pyrethrum based, contact-only substance which is, I believe accepted as organic.
Tomatoes are growing on well. Most of them have flower trusses and I have staked the plants up. This year, I have only three varieties, to fit in with my needs – Alicante and F1 Fantasio  [good standard type tomatoes which will be excellent for all-round use and will store and freeze easily; and Sultana – a miniature, sweet, salad-type, plum tomato –a sweetie! brilliant!
On checking the plants in my tunnel, I have noticed that my chilli and pepper plants have shown serious leaf-curl on their young growing leaves. These plants are very young and the damage looks much like that caused by red-spider mite. However, on close examination, I saw no red-spider mite but a few green aphids, their damage is surely containable - were present on the affected plants – really, only a very few, yet the damage was quite noticeable. I have sprayed the with Py, being conscious of the limitations of this compound for ‘contact only’, I made sure I sprayed the underside of every leaf – easy at this diminutive size but, if the problem continues this will be a more difficult problem.
Last year, in my poly-tunnel, I sprayed with SB plant invigorator. Highly recommended and organic [although I have yet to find out what the active ingredients are!]. This substance will – most importantly – feed your plants, strengthen your plants and fight off bugs, parasites and pests. Sounds too good to be true. This was the only ‘chemical /substance’ I used last year and I found that it has wiped out red-spider mite in my poly-tunnel and apparently – white fly on my brassicas this year.
Well. I might be a bit neurotic but, anything which is that effective must surely be questioned. Please get back to me with your thoughts on this.