Pages

Friday, 18 May 2012

Mid May - beans, tomatoes, peppers, chillies, and more


Mid May – beans, tomatoes, peppers, squashes, etc
Well, of course, it’s now mid may and there is going to be an ‘of course’. This is the middle of the planting season – or is it?
I am an impatient person and I’m always pushing the seasons, especially springtime. Let’s face it, winter is not the lean season – that is spring, when the stored crops have run out and the new crops have not yet started. In four seasons out of five, in south west England, the earliest time suggested for sowing will work well and will give crops well ahead of the average harvesting season. However, this year has been unusual – a very hot dry March followed by the wettest April on record and not much improved by the first half of May – and it’s been cold.
My autumn sown broad beans have started to produce pods. I have lots of them and I find that cropping a few of the young pods can be cooked and taste much like French Beans. They are good to eat and really won’t be noticed from the main crop, which will ‘get-into-its-stride’ shortly.
I sowed my different varieties of French beans after soaking them and allowing them to sprout. Unfortunately, the weather turned very cold and wet and nothing much has happened with them. Yes, I know, they should be sown later rather than early  and June would have been better.
Today has been dry, though cloudy. My barometer dropped dramatically overnight so, I thought an early start might be useful, before the rain set in. I noticed, with some relief that my beans have started to germinate. I might have to re-sow but, as my daughter suggested last weekend, when she surveyed my plot – be patient! Mammy you are always so impatient. And, yes, today, I notice that the odd bean is beginning to appear above ground. This didn’t prevent me from re-ordering bean seeds but, I might now just keep them until next year.
I have found, this year particularly, when I have contacted Thompson and Morgan about orders I have placed [and in the past I have criticised them] that their telephone contacts have been – on the ball; have known what they are talking about; have been friendly and informative and have sorted my issues – 5 stars to them.
Back to the plot – My poly-tunnel has been a continuing problem this year. Red ants have been the biggest and most destructive pest. Every other year, I've had a few red ant nests and have more-or-less ignored them.This year, it has been apparent that they have been a major destructive pest. When I visited my plot, just to water the tunnel I have had to dig out and destroy more red ant’s nests. As I have said before, this season, I have been spraying with Py spray – a pyrethrum based, contact-only substance which is, I believe accepted as organic.
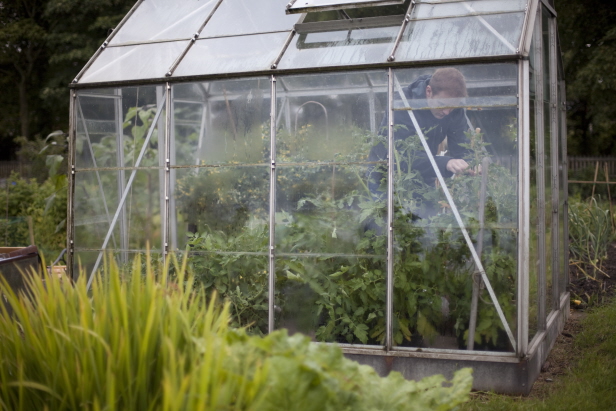
Tomatoes are growing on well. Most of them have flower trusses and I have staked the plants up. This year, I have only three varieties, to fit in with my needs – Alicante and F1 Fantasio  [good standard type tomatoes which will be excellent for all-round use and will store and freeze easily; and Sultana – a miniature, sweet, salad-type, plum tomato –a sweetie! brilliant!
On checking the plants in my tunnel, I have noticed that my chilli and pepper plants have shown serious leaf-curl on their young growing leaves. These plants are very young and the damage looks much like that caused by red-spider mite. However, on close examination, I saw no red-spider mite but a few green aphids, their damage is surely containable - were present on the affected plants – really, only a very few, yet the damage was quite noticeable. I have sprayed the with Py, being conscious of the limitations of this compound for ‘contact only’, I made sure I sprayed the underside of every leaf – easy at this diminutive size but, if the problem continues this will be a more difficult problem.
Last year, in my poly-tunnel, I sprayed with SB plant invigorator. Highly recommended and organic [although I have yet to find out what the active ingredients are!]. This substance will – most importantly – feed your plants, strengthen your plants and fight off bugs, parasites and pests. Sounds too good to be true. This was the only ‘chemical /substance’ I used last year and I found that it has wiped out red-spider mite in my poly-tunnel and apparently – white fly on my brassicas this year.
Well. I might be a bit neurotic but, anything which is that effective must surely be questioned. Please get back to me with your thoughts on this.

Friday, 4 May 2012

Asparagus Season


Asparagus
I love eating fruit and vegetables in season. While many of them lend themselves to the creation of exciting preserves and a few can be frozen successfully – peas, sweetcorn and tomato pulp for winter use as well as raspberries and stewed apples – for the most part I do prefer them fresh. I look forward especially to those very seasonal vegetables like asparagus, globe artichokes and runner beans and with fruit – to the strawberry season. However, I also find that, after the original excitement of them, those flavours pall after a few weeks.
This year I started harvesting my asparagus in mid March. I have waited for three years to be able to eat it and was totally thrilled to be able to take home my first small bunch. However, I caught a rather inconvenient virus a few weeks ago, which affected my sense of smell and taste. As anyone, who is familiar with asparagus knows, it does funny things to your sense of smell. During this time I found it quite difficult to eat – I could even smell it from my skin. I found I was giving lots of bunches away. For such a luxury vegetable this is really a shame – well maybe not as, the friends I gave it to were delighted.
When I was young, few recipe books had recipes for asparagus and many of those demanded that we have special asparagus pots for cooking it – of course, it was very expensive and had to be treated with respect. Mostly it would be served with Hollandaise sauce and, how delicious was that! Many of these books would be hung up on whether it was white, purple or green asparagus – the white variety being the best and most expensive, the green being the least expensive [but, many thought, the most flavoursome] these days, do we care? We just eat and enjoy it.
Now, of course, asparagus is much more readily available, is much cheaper and is available – imported – all year round. For me, I will not buy out-of-season imported vegetables and I personally think that imported out-of-season asparagus is fairly tasteless. So, let’s enjoy it while it is available – fresh.
If you grow your own asparagus, harvest by cutting the stems close to the ground. The thicker ones are probably the male plants [many seed/plant companies will guarantee male only plants when you buy them], the thinner ones are probably the female plants but, don’t sneer at them, they are thought to have a much better flavour.
When you take your spears home, you will find that when you bend the stems, they will break at the point between where the stem is woody and where it is lusciously edible. It’s funny that, although I’ve been a dedicated cook for many years, I didn’t know this until I holidayed at a cookery school in Andalucia [in southern Spain] last autumn where they actually have two asparagus harvests each year.
If you have a suitably deep container to keep the asparagus upright then it is best cooked that way – the stems need longer to soften while the tips are best cooked in the steam above. About 20 minutes in gently boiling water should do it. Steaming is probably preferable. Allow  6 – 8 minutes [ less if the asparagus is thin]. Then drain well on kitchen paper.
I was listening to a TV chef giving advice to someone last week on cooking asparagus [I regret that I don’t remember who to give him credit]. However, he suggested that asparagus should be cooked in boiling salted water for 1½ minutes then plunged into iced water. It would then keep in the fridge for several days to use in a variety of dishes. That said, I have kept freshly cut asparagus in my fridge for 3 – 4 days before using and it has remained quite crisp.
My personal favourite way of presenting asparagus is also probably the easiest;
Freshly cooked asparagus – 4 – 5 spears per person
Good quality butter
Freshly ground black pepper
A sprinkle of sea salt
Lemon wedges.

Try it also with Hollandaise Sauce: Now, if you have ever tried to make Hollandaise Sauce you will know that it can be quite tricky and time consuming. However, Hugh  Fearnley-Wittingstall in his ‘River Cottage Veg, everyday’ which my son-in-law bought me for Christmas [a wonderful book, do buy it if you can afford it!] has come up with an easy method – as he calls it ‘ a cheaty hollandaise’ ( Melt 150gm butter and whisk it, a little at a time, into an egg yolk until it has a loose consistency, like mayonnaise. Whisk in a generous squeeze of lemon juice and season with a pinch of salt and some pepper.) Of course, this recipe is also good for lots of other vegetables and dishes.

Asparagus is also excellent with a variety of other sauces:
Asparagus in Almond Sauce [from Finca las Encinas – if you can, do book in for a course on cooking there – a truly memorable experience – www.finca-las-encinas.com  or cooking@finca-las-encinas.com ]
1 small ripe tomato
½ small head garlic, unpeeled
50 – 60 g slivered blanched almonds
½ tsp sherry vinegar
60 ml extra virgin olive oil
375g asparagus, ends snapped off
Salt
Method
* Roast the tomato and garlic in the oven 180ºC/Gas 4 for 15 minutes
* Peel the tomato and the garlic cloves.
* Toast the almonds on a baking sheet until golden for about 4 minutes.
* Add tomato, garlic and almonds, vinegar and salt to a food processor or blender until very smooth. Continue mixing. Slowly add the olive oil until it appears like mayonnaise. Taste for salt.
* Grill the asparagus on an oiled skillet or griddle, occasionally turning, for about 10 minutes.
* Serve immediately topped by the almond sauce.

Asparagus with cheese sauce
1 bunch of asparagus – preferably freshly cut, washed and trimmed
For the Sauce
50gm [2 oz] butter
50gm [2 oz] plain flour
250ml [½ pt] milk
75gm [3oz] grated cheddar cheese
Salt and coarsely ground black pepper
Method
·        Steam the asparagus spears.
·        Melt the butter in a saucepan with the salt and pepper.
·        Add the flour and cook until a roux is reached [ don’t allow the mixture to brown or burn!]
·        Gradually add the milk, stirring all the time until the milk has been worked into the mixture without lumps – stirring all the time!
·        Bring to the boil and boil for 1 minute.
·        Add half of the cheese and stir in until the cheese has melted. Season to taste.
·        Spoon the sauce over the cooked asparagus in an ovenproof dish.
·        Sprinkle the remainder of the cheese over the sauce and asparagus.
·        Cook under a grill until the cheese is lightly browned and serve.

Thursday, 3 May 2012

New Season's crops - Rhubarb

What we can do with rhubarb 
Well I'm not a huge fan of rhubarb. I don't eat puddings and not a lot of jam. However, I do accept that I have a plot of very early rhubarb which others think is just brilliant. And I have another plot which everyone ignores - It wrenches at my heart strings!
I have inheritated these plants so, have no idea of the varieties. It has been suggested that the early one  is Champagne but, I could not guarantee that. The other is definitely the common-or-garden variety.
My uncle told me years ago, when splitting or propagating rhubarb, to dig the roots up and throw them  to the back of the compost heap overwinter to allow the frost to get at them. Although I have not had to do this for myself, I have noticed that when I'm passing the roots on to others, it seems to work quite well. Personally, I'm finding it quite difficult to get rid of in some areas.
I may not be Rhubarbs greatest fan but, ther is so much you can do with it - check out these recipes: Although I don't have photos for all of these, I have, over the years, checked out all of the recipes.

Rhubarb Crumble
3 – 4 good sized stalks of rhubarb – washed, trimmed and cut into 1cm  [½inch] slices
3 Tblsp sugar
1 Tblsp plain flour
Topping
100gm [2oz] plain flour
100gm [2oz] rolled oats
75gm [ 3oz] butter
50gm [2oz] soft brown sugar
Method
·         Mix the prepared rhubarb, flour and sugar then arrange in a suitable pie dish – approx 1 litre [2 pt].
·         For the topping, mix the flour, oats and soft brown sugar then rub in the butter as finely as possible.
·         Sprinkle the topping over the rhubarb evenly.
·         Bake in a moderate oven [180ºC or 5 gas] for approx 40 – 45 minutes until the topping is golden brown and the fruit is soft when checked with a skewer.
·         Serve with custard, ice-cream or double cream. Enjoy.

Rhubarb Sponge Pudding
3 – 4 good sized stalks of rhubarb – washed, trimmed and cut into 1cm [½ inch] pieces
2 Tblsp sugar
Topping
75gm [3oz] butter
75gm [3oz] caster sugar
2 medium to large eggs
100gm [4oz] plain flour } or  100gm self raising flour
1 tsp baking powder       }
Method
·         Stew the rhubarb with the sugar until soft – allow to cool. Put into the pie dish.
·         Cream the butter with the sugar until pale and creamy.
·         Gradually beat in the lightly whisked eggs.
·         Sieve the flour with baking powder and fold in gently.
·         Spread this mixture over the cooled rhubarb ensuring it has all been covered.
·         Bake in a moderate oven – [180ºC, No 5 Gas] for approx 45 minutes to 1 hour. Reduce the heat if necessary in the later stages.
·         Serve hot with custard or cream.

Rhubarb and Ginger Pie
Ingredients – for a 1 litre ( 1½ - 2 pint) pie dish
4 good-sized stalks of rhubarb
3 Tblsp. sugar
A few pieces of crystallised or stem ginger in syrup – finely sliced
Short crust pastry
150g plain flour (6oz)
75g margarine or butter (3oz)
6 tsp cold water approx.(this amount may vary slightly depending on the weather and the flour you are using – you need the ingredients to bind together without being sticky).
Method
·         Sieve the flour and salt into a baking bowl. Add the margarine and rub in with your finger tips to create a texture like fine breadcrumbs – don’t allow the mixture to become sticky.
·         Add the water slowly to ensure the ingredients combine without becoming too soft.
·         Knead gently to combine the ingredients for a short time – 1 minute.
Making Pie
·         Preheat the oven to 180°C, Mark 6 gas
·         Wash and trim the rhubarb. Cut into 1cm or half inch long pieces.
·         Put a layer of rhubarb on the bottom of the dish, sprinkle with half of the sugar and ginger
·         Repeat this process.
·         Roll out the pastry on a lightly floured board to ½ cm thick approx.(¼in)to the shape of the pie dish. Cut off a strip of pastry wide enough to go around the rim of the dish
·         Wet the edges of the pie dish with water and apply the strip to the edges. Wet the top of the pastry strip with water.
·         Put the pastry on top of the pie. Trim and seal the edges. Put a small slit on the top of the pie to allow the steam to escape.
·         Bake for about 15 – 20 minutes then reduce the temperature and bake for a further 15 – 20 minutes to ensure the fruit is cooked. Don’t allow the pastry to burn
·         When baked, sprinkle the top with a little caster sugar immediately and serve with cream, ice-cream or crème fraîche.

Rhubarb Fool – serves approx 4 portions
2 – 3 stalks of good / sweet rhubarb
1 Tblsp soft brown sugar
For the custard
450 ml [ ¾ pint ] single cream
1½ Tblsp soft brown sugar
1 Tblsp cornflour
3 egg yolks – medium to large eggs
Method
·         Wash, trim and slice the rhubarb into 1cm [½ inch slices].
·         Cook gently with the sugar until soft – stir occasionally – don’t allow to ‘catch’.
·         Allow the rhubarb mix to cool.
·         Put the cream in a saucepan and heat until it is boiling gently. Don’t allow it to burn.
·         In the meantime – put the egg yolks, sugar and cornflour into a bowl and mix well.
·         Whish in the boiling cream then return to the saucepan.
·         Continue to whisk this mixture over a gentle heat until it thickens then, remove from the heat.
·         Cool.
·         Mix the rhubarb and custard mixtures thoroughly then spoon into individual dishes.
·         Chill and serve with whipped cream or crème frâiche – decorate with some mint leaves.

Rhubarb and Ginger Jam
1 – 1.2 kg Rhubarb [  5 – 6 good sized stalks] – washed, trimmed and cut into 1 cm [ ½ inch slices]
Allow the same weight of sugar as rhubarb
25 gm [1oz] root ginger
100gm [4 oz] stem or crystallised ginger
Method
·         Put the prepared rhubarb into a non-metallic bowl/basin and sprinkle the sugar over.
·         Cover and leave it overnight or for about 12 hours.
·         Put the fruit into a large saucepan or preserving pan.
·         Smash the root ginger with a pestle or similar and wrap in a piece of muslin – add to the rhubarb mix.
·         Heat the rhubarb gently then bring to the boil.
·         Add the chopped crystallised ginger then boil briskly until all of the fruit is very soft and the jam starts to thicken – as rhubarb is not really a fruit and there no pectin it will not ‘set’ like other jams – it will not set like other jams.
·         Pot and cover in the usual way.

Rhubarb Chutney
3 – 4 good stalks of rhubarb – washed, trimmed and sliced – about ½ kilo or 1 lb
Approx 1 inch square [ 2cm] fresh ginger – peeled and grated
3 – 4 large garlic cloves – peeled and finely chopped
1 – 3 chillies – depending on desired heat[ my favourites are Joe’s Long - predictable heat and perform well even in cool conditions – they also dry and store well] if you don’t want it too hot, don’t use the seeds.
2 tsp Allspice
1 tsp salt
100 gm raisins, sultanas or chopped dates
175 gm [6 oz] sugar
500ml [ 1pint] malt vinegar – you can use wine or cider vinegar if you prefer
Method
·         Prepare the rhubarb and finely chop the ginger, chilli and garlic.
·         Put all the ingredients into a preserving pan.
·         Bring to the boil then lower the heat until all of the ingredients have softened and the rhubarb is well broken down.
·         This should take about 30 – 40 minutes and the mixture should have the texture of a soft jam.
·         Pot up in sterilised jars, seal and label.