Pages

Friday, 27 May 2011

Growing Leeks


Planting leeks

My little friend. He turns up whatever the weather, accepts a cuddle then, gets on with the business of catching lunch. I do know it's mostly birds and rats and that I'm attracting them by feeding them daily but, I try to keep the birds out of his reach. Unusually, he is a male. Normally it is the females who are the killers. But, he is cute and I believe, he lives off his hunting. Don't know his name but, he responds to 'Puss'


When I first took on my plot I was anxious to grow enough vegetables and a wide enough range of vegetables to provide for my needs all year round.
In my first year I came pretty close – it was a mild winter and although I became heartily sick of purple sprouting broccoli by the end of spring, I only had to buy onions, garlic and potatoes from January onwards and mushrooms occasionally (I've never attempted to grow them).
Although I'd never attempted to grow them before, I do love leeks and they are an important basic vegetable for use during the late autumn, winter and into spring. That first year I sowed a whole packet of Musselburg(Dobies) – it seemed like a good, reliable, not too expensive variety. I think possibly every seed must have germinated. I had leeks to give away to anyone who wanted them.
One of the other plot holders who had grown leeks successfully for many years recommended that I plant them out before the end of May. In a normal year this is probably excellent advice – this year it has not been quite so easy as the ground is rock hard after the very dry spring. With this practice you can start to eat excellent leeks by the end of October though, to have a crop to take you right through to April it is important to also have a later sowing. Last year I shared my early sowing with my daughter and she shared her later sowing with me. They were all excellent and what an great plan!
We thought this year, we would use the same strategy again. I sowed seeds in my polytunnel on 1st March. I thought I’d try a couple of different varieties so started with F1 Carlton (from Dobies). The germination rate was dismal – I believe I got 15 plants! I sowed again. This time Toledo (Dobies) – the result has been even more disappointing and the ones which did germinate have made little progress. While I might be wrong, I believe the unusually warm, dry weather this spring has been responsible for the poor results, not just in leeks but with other crops as well.
I have sown again, outdoors so I just might have enough leeks though, only 15 to see me through the autumn! I think I might be begging!
The recommendation is for the leeks to be ‘pencil’ size when transplanting. As always some of my pencils are small and skinny and some really quite chunky but, they all grow just the same.
We all know that, when transplanting it is important that the roots should have as little disturbance as possible - well, with leeks, it seems, this is not always the case. The first of my advice of transplanting leeks is as follows:
-Water the ground where you are going to plant your leeks, really well.
- Using a pair of sharp scissors, trim off the ends of the roots and the tops of the leaves.Using a dibber(I use a dibber a neighbour gave to me made from an old spade handle – it is excellent).


Whatever you use, you will need something which will form a hole 2-3cm across(1in) and about 15cm deep (6in).

- You should plant the leeks about 15cm(6in) apart in rows about 20-25cm(8-10in) apart – wide enough to be able to hoe comfortably between the rows.

- Drop the prepared leeks into the holes then fill the holes with water.


Well, I have read around quite a bit on the subject of transplanting leeks and lots of different advice is given. Some information will suggest that they should be germinated in individual cells or pots to avoid disturbing the roots. Others suggest digging a trench and placing the young leeks along it.
I started by using the method I’ve given above and it has worked extremely well with no losses after transplanting so, I guess I’ll stick with that method.
 It is a bit like the continuing debate on when to water tomatoes. Some experts say they should be watered a little twice a day. (That would seriously not suit me!) Others say they should be given a good drenching every 3-4 days with nothing in between.Apparently it makes the plants lazy and shallow rooted !
I think we must try different methods and see what works best for us. Good luck. But, please do leave a comment if you have any better advice.

Monday, 23 May 2011

Summer Fruit

Well! Isn't that just like the thing! In April the weather was like June weather and all the crops were rushing ahead of themselves.
I grow lots of strawberries and have two fairly large 'patches'  - each two metres by three and a half.  It was looking good. I was preparing for a bumper crop and lots of jam making. This week - at the end of May - the weather has been described by our weather-men as being more like the end of October. I did harvest some strawberries - about a small punnet. They are not that vibrant red colour we expect but, are sweet and soft and ready to eat anyway - don't leave them if yours are like that, waiting for them to get redder. They will sit there until they rot or the birds and slugs will have them instead. However, the jam making will have to wait a while longer.
My raspberries are also beginning to ripen - today I picked a small bowl, a VERY small bowl. These are from last year's canes. As I have said in a previous Blog, I don't cut my canes back at the end of the year (neither summer nor autumn fruiting and I really don't understand why this is done!), I do take  the tops of them, for the sake of tidyness, leaving them about a metre tall, or perhaps a bit taller. Those canes are now in the process of giving me a crop, well in advance of this year's canes. The best raspberries in the UK are grown in Scotland where it is much colder than the south west of England. I don't expect that our present 'cold' snap will do any harm to my raspberry crop. But, do watch for yours ripening. Although birds are not a big problem for me with strawberries and raspberries, they will certainly take them if there is a shortage of anything else to eat.
Redcurrants and blackcurrants are now starting to colour-up. If we can see this, so will the birds and will take them all as well as your gooseberries before you have a chance to harvest them. If you really want these crops it is essential to net them. I have seen some of my fellow plot holders drape a piece of net over the tops of their currant bushes in the expectation of deterring blackbirds and/or pigeons from taking these crops. I have also seen these birds under the nets, tucking happily into the fruit until they are almost too heavy to get off the ground. I'm sure I have said this in every Blog lately but, net the bushes securely while leaving a gap for the birds to escape if attacked by a fox or a cat - that may sound like a contradiction, and it is but.........! I really do like the birds too.
Has anyone else noticed that we have more honeybees around this year? In previous years, while I saw lots of bees, they were bumble bees, solitary bees,though few honey bees. On my group of allotment fields we now have four beekeepers and interestingly a 'top-bar bee-keeper'. Do check out the information on this on the link to the allotment website. It is captivating!
Increasingly, we are having to net a wider variety of crops. This morning I had to cover my salad bed as the birds - I'm guessing pigeons - have stripped several of my young Romaine lettuces. I won't starve because of it as I grow a lot more than I need but, I don't want to lose my whole crop. Net is expensive and systems for lifting it above the crops is also expensive. Today I had to use the fine net I hate to protect my crop but, I will replace it as soon as possible as the birds catch their feet in the fine net and can die a miserable death unless we are there to rescue them.

I picked a small vase of sweet-peas from my plot today - sown in the autumn and over-wintered in my polytunnel, they are actually quite hardy plants. I planted them out in March and although they were slow to establish, they are now starting to flower. And! what an amazing fragrance they give to my house, even this little posy. If you do grow them, they need lots of feeding (best planted into well manured ground at the start),but, do keep cutting the flowers and removing the seed pods of any you might have missed or they will stop flowering.

Check out the website for recipes on jam-making, jelly making, chutneys and pickles

Sunday, 22 May 2011

Growing and propagating perennial herbs - 2

My second Blog on perennial herbs.
I will start with Bay - Laurus nobilis.
This makes a wonderfully attractive shrub for the garden though, I keep mine in a large pot as it can become quite a large tree for small gardens such as mine. Last year, I decided that, although it was in a pot, it was growing very vigorously and decided to move it to a corner where it wouldn't be in the way. I discovered that it had rooted through the bottom of the pot into the earth and it was really quite hard to move. Although I had to cut its main root it doesn't seem to have suffered too much. When I think of it I have a giant redwood tree - also in a pot which is also looking a bit too vigorous for a pot grown tree - perhaps I should move it too, before it's large enough to put a motorway through! 
Having fresh leaves whenever I want them, I wouldn't dream of using dried bay leaves. The leaves have quite a pungent aroma and flavour which is excellent in bouquet garni, in savoury casseroles or just put 1or 2 leaves into the dish. Remove them before serving, they are not particularly eatable. When I was growing up a well-known Italian cafe owner in my area, always made his own ice-cream. The flavour was outstanding and really hasn't been beaten by any ice-cream I've had since (though perhaps that is just my childhood memory). He once admitted that BAY was the secret ingredient in his ice-cream recipe. My favourite use for bay leaves is in a recipe I use for the Indian dish Dhansak - when I grind a few bay leaves along with coriander seeds, cumin seeds, fennel seeds, green cardamons, a few red chillies, fenugreek and black mustard seeds and some cinnamon bark. The aroma from this mixture is amazing.
A friend of mine has a large mature bay tree which produces berries. I did wonder if these berries could be used. On investigating I learned that it is important that they should not be mistaken for bayberries - the fruit of Myrica or Myrtle which are used to flavour drinks and have medicinal uses. There is little information on Bay Berries though, what there is would suggest that it is probably not a good idea to use them for culinary or medicinal purposes. They can be planted as seeds to produce another Bay tree though, so far I have had little success with this. Further reading suggests I should have scarified the seeds first. I have had some success with growing from soft-wood cuttings, when I had about 25% success.
Mint - Mentha
Mint is a hardy perennial and is easy to grow. Unless controlled, it can take over your plot. There are many varieties, though probably the most popular is Mentha Spicata or spearmint. I have grown a couple of varieties in an old Belfast sink in my garden (in an effort to keep it under control). However, I did notice that, after a couple of years it became very pot bound and was not thriving. I do replace it, taking a two or three root cuttings from each variety and replanting in fresh compost. I did take a couple of root cuttings to my allotment, thinking it would be happier there and would have plenty of room. Yes, this worked well. Both varieties grew well into strong healthy plants and quickly covered an area approximately 2 metres square. The bees loved it and every time I brushed past the herb the aroma was intoxicating. However, I did then wonder why every other plant in the area was sickly, especially my pear tree which failed to produce a crop or new growth. A friend pointed out that the mint was the probable culprit so, I had to dig most of it out and have been careful, ever since to keep in it its place. As summer progresses the mint becomes quite straggly and tough. Cut it back to the ground and it will quickly put up new fresh growth.
It is easy to propagate, just dig up a couple of root cuttings (you will find them easily all around your plant) and replant in a pot or a new part of the garden or plot.
It is a wonderful herb which makes delicious sauce for roast lamb, mint tea or chopped in salads. It is a gentle and effective aid for indigestion. I put finely chopped mint into crabapple or gooseberry jelly for serving with roast meats or cold meats.
As it dies back in winter I always pick loads of it while it is still at its best, strip the leaves from the stalks and put it through the food processor with a little sugar and vinegar, then I can store it in my freezer for use during the winter. It can also just be chopped or processed then frozen in small containers without additions. Frozen herbs do lose some of their pungency when frozen but  I just use more.
Origano - Marjoram _ I'm never quite sure of the difference. In my garden I have several large plots of Origanum which have spread themselves by seed from my original 1 green and 1 golden plants. They are very hardy and the heavy frost of the last two bitterly cold winters have made no impression on the huge mounds growing. They stop growing during the winter but, don't die back so I never make any effort to preserve it for winter use. I can still pick enough leaves to use in my cooking. However, cutting back when it has finished flowering will give you an fresh burst of new growth. You can propagate from seed, by taking cuttings or easiest - just divide the root. I haven't had to do this as it seems to propagate itself.
It is a wonderful herb in the kitchen, delicious and aromatic and I use it chopped with lemon thyme and tarragon in many savoury dishes.

Tuesday, 17 May 2011

How do we deal with the Drought? The positives and the negatives.

Continuing Drought
In the south west of England we did have a little rain in early May – and very useful it was too – for a short while. Although, at the moment it is quite cool, much cooler than in April, and we see daily dark threatening clouds, we have not had any more rain. (No! I lie! This morning we did have a short 30 second drizzle shower, it didn’t wet the ground nor me, really. But, at least everything seemed slightly fresher. No rain is forecast for the foreseeable future. The south east of England is having an even harder time as they have had no rain at all since the beginning of April. There has been rain in the UK. Lots of it, and all going to the north of England, Scotland and N Ireland. I’m sure they would love to share it with us. Already here, although it hasn’t yet happened, there are threats of hosepipe bans.
But, we deal with what comes because we can’t change it.
As always, whatever the weather brings us, it is good for some stuff and not so good for others (well, apart from the East wind perhaps!) as the old saying goes ‘when the wind is in the east, ‘tis good for neither man nor beast’.
Brassicas this year – so far – have been a disaster. I sowed my brassica seeds in my polytunnel  in March and early April, expecting to have them all planted out by now. But, the ground has been too hard to dig and most of the plants have now been composted as they had grown too tall and ‘soft’ to be of any value. A few I had planted out early are doing well or at least ‘holding their own’. However, I will just re-sow some varieties or do without.
Broad beans – autumn sown only are now being harvested and although they are sweet and have a delicious flavour, they are not particularly lush plants and are already being attacked by black fly. They won’t last until the runner beans are ready.
The positives, however, face me each time I go to my allotment – some onions are ready to eat and garlic could be harvested as ‘wet garlic’ wonderful roasted. ‘Wet garlic’  is the young bulbs which have not yet developed the hard skin around each clove. Slice them in two horizontally and put in with roast chicken or lamb 40 mins. or so before the end of cooking and serve as a vegetable. I have noticed that both my onions and garlic from last year have 'saved' until now. A few have rotted or dried out but at least 75% have been excellent. I believe that this may have been due to the lack of rain in May last year which has given these bulbs a higher proportion of dry matter and helped them to keep. Of course I also had to grow enough. One of my allotment neighbours has had similar positive results and frequestly proudly presents me with two perfect red onions. I haven’t the heart to tell him I still have lots of my own. Though actually, I no longer have lots, I only have a couple of kilos left and a handful of viable garlic bulbs.
My beans, now that I’ve managed to get them sown or planted out are looking healthy though, I do have to water them regularly. I have noticed that pigeons are widening their taste-bud experience. Although I put out food for the birds each time I am there, the pigeons have been eating my young carrot greens and are now starting on the young bean plants. I believe it will get to the point that every crop will have to be netted.
My herb garden is thriving. Many herbs don’t really like wet conditions and although my ground is much heavier than many of the herbs would choose they are looking good. Two years ago I sowed a packed of lavender seed. I do believe that every seed germinated as I potted up about 100 little plants – I have been giving them away to anyone who would take them. Some went to my daughter who lives in London and those in her garden are now large bushy, lush plants (her soils is light, sandy and free draining). The plants I put into my garden and allotment (heavy clay soil) are definitely growing but are really quite stunted by comparison.
Unless we are struck by some weather catastrophe, we should have bumper crops of soft fruit. Although I’m harvesting some strawberries already I’m sharing them with the blackbirds who have a habit of eating the sweet, red side from every ripening berry. But, they are also struggling this year and in a couple of weeks I won’t notice the few they take. Although I have netted some of my raspberries it is only because they share their space with currant bushes. I don’t think birds do a lot of damage to raspberries, unlike woodlice which do a lot. When it comes to gooseberries, blackcurrants and redcurrants the birds will not share with us. You will look at the bushes and think – I’ll harvest those in a couple of days, they will be ready. When you return you will be lucky to find a couple of fruit hidden behind a leaf that the birds have not seen.
Don’t forget to thin beetroot, carrots and parsnips now. It pains me that I always find the best ones in clumps while the little spindly ones are well spaced already. I have in the past successfully transplanted beetroot and carrot seedlings into the spaces in rows. Though the ground is so dry this year I’m not sure how successful it would be now. Be sure to dispose of carrot thinnings well away from the seed bed so that the smell doesn’t attract carrot fly, and water the beds well afterwards to reduce the smell. It is always recommended to thin carrots in stages, the second thinning when the young plants are big enough to eat. However, I prefer to thin just once, to spacings which will give enough room for the mature carrots to grow properly. I feel this reduces the opportunities for attracting carrot fly. Protecting with environmesh does form an effective though not impenetrable barrier to the flies and companion planting with highly aromatic plants such as marigolds (French or African), sage, rosemary, garlic can also be helpful. I find that the smell of marigolds makes me  feel ill so I can understand how it might keep some pests away.
And, as I am about to post this, I notice it is drizzling again - lightly. Yippee!

Tuesday, 10 May 2011

Tomatoes, Beans and Strawberries

Tomatoes, Beans and Strawberries


I was talking in my last blog about looking after tomato plants. Pinch out the side shoots as shown in the photograph,  if they are NOT 'bush' tomatoes. Keep looking for these side shoots - they will regrow and will develop as the plant grows. If you haven’t bought them from a garden centre you might find that you can think of planting them‘out’ in your greenhouse or polytunnel now. I’d be a bit wary still of planting them outdoors in case of late frosts. A fellow plot holder bought a few really nice, really strong potted tomatoes in a garden centre two or three weeks ago. Since he couldn’t put them out at the time, they have now become very overgrown and 'leggy'.
Now the broad beans are coming close to harvesting, young sweet and tender – I’ll maybe give them a few more days. They have managed to outgrow their very miserable appearance after the harsh winter. I didn’t sow any broadbeans in spring this year, only last autumn. I have found that the spring sown ones, coming ready about three or four weeks after the autumn ones are very prone to black fly attack, in spite of pinching out their growing tips. I could spray them with something nasty, I suppose but, I really don’t want to do that. In any case, other vegetables are ready to eat so they are not so essential to fill in the ‘hungry gap’.
Try this very tasty recipe given to me by a fellow plot holder which he had discovered in The Cook’s Guide to Vegetables and recommended it:
Broad Beans à la Paysanne
15ml Olive oil -                                      Heat in a saucepan.
1 onion – finely chopped                        Fry onion and ham until soft.
75 gm ham – lean, thick and finely diced     
350gm broad beans – shelled               Add the beans and lettuce.
2 Little gem lettuce – chopped .Cover and cook gently for 6 – 8 mins, stir occasionally.
75 ml stock – chicken or vegetable Stir in the stock, cream and seasoning and cook over a verylow heat for 20 - 30 mins, stirring occasionally, taking care not to break up the beans. 
50 ml single cream                                         
Salt and freshly ground black pepper    
Sprigs of fresh mint or chervil               
                                 Turn into a warmed serving dish and garnish. Serve with grilled meat or an omelette or as a lunch dish with crusty bread.
Notes: For a stronger flavour try smoked bacon or ham.
For a lighter dish, replace the cream with crème fraiche.
Runner beans and French Beans
Following advice from a well known TV gardener a couple of years ago, I no longer sow my beans straight into the ground – then wonder what happened to cause the abysmal germination rate of my beans. Now I ‘chit’ or sprout them first, over wet paper for a few days, until they start to sprout. Then, pot them up in 6 – 7 cm pots until they produce strong little plants. When all risk of frost has passed you can plant them out. (risk of frost is something you must gauge for yourself depending on where you live) this year, as soon as it had rained enough for the ground to be workable I put them all out. I know there is still a possibility of a late frost but now, I’m prepared to take that risk. In fact, last year I put my runner beans out at the beginning of May.

Runner beans and climbing French beans must have a strong wind proof frame to grow up – this can be as a tepee shape or as long crossed rows. Remember, when the beans grow up they will create quite a solid shape for the wind to meet and knock over.
I love runner beans, young and fresh they are probably my favourites but, they can grow past the young and fresh stage fairly quickly and become old and tough. When ready – what you can’t eat yourself, sell or give away – pick. Pick every day or every 2 days and if necessary put in the compost. Once you allow the beans to mature the plants will stop producing.
That said, each year I await with some impatience, the start of the runner beans but I really do get tired of them by the end of July. I did try freezing them last year. They were horrible. Best to eat them when they are fresh and enjoy then, await with impatience the bean crop next year.
French beans (kidney, flageolet and haricot) give a wonderful variety which can be climbing or dwarf (don’t need climbing frames). They can give you tasty young beans you can eat early in the season, pods and all, or even just pods as in the green French beans and ‘fine’ beans you see imported to our super markets. The pods can be a range of green shades or purple(though, in fairness, the purple ones are green when cooked). All, when picked young and fresh are delicious – don’t overcook them. Some varieties are excellent for drying and storing for the winter(or even for seed for next year – though, they are promiscuous, they will cross pollinate). My favourites are Borlotto(beige with red splotches) – can be climbing or dwarf – and Yinyang or Orca beans(very clear black and white in a yinyang design – how very pretty). I started with them a few years ago when my daughter bought a packet or them from somewhere – she gave me half – half of which germinated. I saved all of the beans for seed. The following year, I was able to use half, give some to other keen bean growers and keep some for seed. Don’t sow them too early – end of May- early June is good. More on this later.
Strawberries  Do keep a lookout for ripening strawberries. They are turning red now. I found a small ‘bunch’ ready on my plot. Unfortunately, so had the birds.  I do understand if you must net the crop when you only have a small patch but, please! keep the net high off the plants and leave an escape hole. Birds, especially blackbirds will find a way in but, if the net is high they are less likely to get their feet caught in the net and die a most distressing death or become prey for some larger bird or a cat. It is irritating when they take a peck out of every strawberry trying to find the sweetest but, life is harsher for them than for us.
The one strawberry I did get this morning which had not been attacked by birds or slugs was DELICIOUS! Roll on the strawberry season!

Sunday, 8 May 2011

It has rained! Now we need to plant out!


The drought is over – for now!
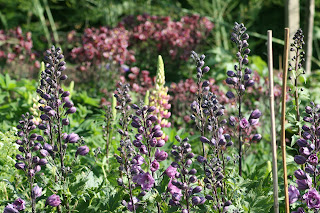
 Well you have to feed the soul as well as the body - early season in my herb and flower patch - I do love the colours. delphiniums, lupins, acquilegia with a herby background - mint and sage mostly


We’ve had rain! In April in Bristol we’ve had 3mm. While it may not be unprecedented, it is certainly the driest April here since records began and although I couldn’t swear to the figures, it is probably close to being the hottest. I have been moaning about it for weeks – well the ‘dry spell’ has lasted for weeks! It is quite sunny today though the rainfall has been satisfactorily steady enough to have done some good to our gardens, plots and farms. A small straight-sided container I’ve had sitting outside my back door (nothing organised, mind you!) has 2-3 cm of water in it so, I have to assume that 2-3 cm of water has fallen in my garden and on my plot in the last 36hours.
I went to my plot yesterday, between showers, to water my polytunnel and harvest some lettuce(winter gem - an early cos variety - delicious) , parsley and chervil (which reminds me – I still haven’t sown my chervil seeds for this year). The conditions were so much better- fresher, brighter and even smelled ‘lush’. Having realised the pigeons were happily grazing my carrot beds, I covered them – well fair enough! I do leave them lots of food every time I visit.
I also planted out the one and only courgette which germinated this year and several West Indian Gherkins and Paris pickling cucumbers. (both from the Real Seed catalogue). In spite of the rain, I watered the beds copiously before and after planting (and I netted them just in case the pigeons fancied a new diet).  I haven’t grown them before. I’m not a big cucumber fan but, I do like pickles and these – if they grow well should give me a good crop for pickling.
I’d be interested to know if anyone else has had disappointing results in germinating seeds this year. So far my ‘Joe’s Long’ chillies and my ‘Baby Bear’ pumpkin/squashes had 100% failure. (I resowed Joe’s Long with somewhat better results – I did get 3 plants). My courgettes – of 5 seeds sown, only 1 germinated. These where all from reputable, though different, seed companies. They were also sown in good condition in my new, ‘state-of –the-art’ propagator along with other similar seeds which performed well. Please do get back to me if you’ve had similar results or have any light to shed.
And brassicas! I have a polytunnel full of the young plants waiting for a new home. Normally I would have parcelled them up and put them in a box at the top of the field for other plot holders to have my spare plants but, this year what is the point? No-one else can plant any better than I can. Perhaps in the coming week I will be able to plant out and give some away.

When I lifted my early potatoes in my polytunnel, I replanted the space with my tomatoes. I’m growing a fairly wide variety this year. I’m looking for that exquisite tomato taste! But also, I need to plan for the winter with lots of tomatoes I can preserve – pasta sauces, chutney, ketchup and  freezing.
My Blog has been suffering from a little bit of neglect in the last few days – I’ve been trying to set up a new Website for our Allotments Association. I’m no computer whizzkid so, the process has been a sharp learning curve. I’ve amazed myself by actually succeeding though, it’s still early days and I still have a lot of processes to learn. When it has been approved, I will put the URL on this site.
My son, who has had his plot for only a few months and has had little experience of growing stuff thinks I should put instructional details with pictures on my BLOG and/or the website for planting, growing, harvesting, what to look for etc.
He is right!
If I’m going to do this BLOG properly then that is what I should plan to do in the future. It does mean I have to take my camera with me each time I go to my plot - the phone camera is really not so good - and I need to plan it into my days’ activities. I might also need  a companion to show what is to be done. But, with a bit of forethought, I will get there.
I will, in the coming year, try to make the Blogs more helpful.
Next time – perennial herbs Part 2 – well I do love herbs in cooking, there must be someone out there who also loves them. Also, growing tomato plants.
My neighbours checking out
their fruit bushes for insect and disease damage

Wednesday, 4 May 2011

Growing, using and propagating perennial herbs 1

Growing, Using and Propagating Perennial Herbs – part 1

This is a very wide subject and I have pondered for a long time on which herbs to include. Well, I came to the conclusion that there is too much information for one blog and, I’m not pretending to be an expert, just a practical gardener. What works for me (or what hasn’t worked), I will share with you.
I did think about doing the herbs in alphabetical order but, I’ve decided, instead, to discuss those herbs which are my personal favourites – thinking they are probably also your favourites – or maybe not!
I think of the old song – Scarborough Fair – Parsley, Sage, Rosemary and Thyme. Well! that is perhaps a good place to start. Parsley is, of course a biennial and has been covered in my last herb blog but, let’s look at the last three in this song/rhyme:
Sage – is a very aromatic herb and in the kitchen, it should be used with caution as it can be quite overpowering. A couple ( 2 -3) of leaves in a pork dish is sufficient.
It is easily grown from seed and, for me is definitely the way forward. It seems to like the heavy soil I provide it with and also thrives well on my daughter’s lighter, more freely draining alluvial soil. In its second year it will become quite leggy so, like with thyme  and lavender, you will need to chop back the woody branches to encourage new growth. That said, treated as a biennial, it definitely produces the most luscious and useful plants in its second year. This might be something to consider. If you  are growing in pots in your garden, Sage will, in a couple of years, become pot-bound. Re-pot in much larger pots – 50% larger- to encourage stronger fresher leaf growth but, perhaps consider every couple of years re-growing from seed.
I love this herb when I’m looking for something ‘spiky’. It is pungent, aromatic and goes well with pork but, beware of too much!

Rosemary – there are so many different types of rosemary – I hadn’t realised how many until this last winter when I lost all – and I mean all of my rosemary plants – one of them about 15 years old, I had thought indestructible. When I went to the garden centre looking to replace my many plants I was told that they had also lost all of their plants, in fact had lost £thousands during this last winter to the very hard frosts we have had.
Last year I had taken cuttings from my various plants, which ‘took’ and established well. Of the dozen approx, that rooted, and established and were planted out variously in my garden, in pots on my patio, on my plot and in my neighbour’s garden, only one survived the particularly harsh conditions of last garden. Well! And I thought I was ‘the business’. But, it was one of the ones I had planted in my neighbour’s garden, that survived. That said, they do root fairly easily from cuttings (don’t use very old woody plants – they really don’t ‘take’ so well), I recommend stem cuttings with a little rooting powder in a moist mixture of peat and sharp sand – keep them damp and warmish until roots have established – several months, then pot up and grow on as necessary.
Thyme – there are so many different types and flavours of thyme. My personal favourite for cooking is lemon thyme. Although I’ve heard TV chefs often suggesting we should avoid lemon thyme as they consider it too dominant. For me, it is the gentler version of thyme. I do grow common thyme in a variety of colours and forms but lemon thyme must be one of my favourite herbs. Obviously this is a personal taste.

I have only managed to find seeds for common and orange thyme and my success rate of germinating or growing on has not been spectacular, to say the least but, I’m trying again this year (for the last time- if it doesn’t work this year, I will forget it).
For me and perhaps, I’m just giving in too easily, I have gone to the website of a herb-grower and bought established strong plants. These, I have planted on my allotment (and a couple in pots at home). Probably 90% of these plants have ‘taken’ well. Once established they will each provide me with 2 or 3 rooted cuttings in the right circumstances. If you want to try – earth up around each plant – the side branches will then touch-down and root into the medium you have provided. During the summer, cut them away from the parent plant and pot on. By this method I’ve probably had about 80% success – not bad , even after a hard winter. After a few years your thyme plants will become too woody to be useful so do think about taking cuttings or dividing the roots before that stage to ensure you have young and useful plants.
I will use the young shoots of thyme or the green thyme leaves, stripped from the branches in most meat or pasta dishes I will serve. I love it and, so easy to grow.

More and other perennial herbs next time.